Oryx Screen Print – How it came to be
My latest screen print, fresh off the press, features this oryx antelope in black and neon pink—a color combination I’m currently obsessed with. It’s based on an oryx drawing I originally created many years ago (back in 2013, if I remember correctly) when I was still doing a lot of pen-on-paper illustrations.You can find the original drawing in the “Pen on Paper” section of my portfolio here.
I had never been able to reproduce such detailed drawings with linocut, so this piece has been sitting in my drawer all this time because I wasn’t sure how to bring it to life. There are many incredible artists who create extremely detailed linocuts—I’m always amazed at what’s possible—but I’ve come to accept that I’m not one of them. I lack the patience (and, frankly, the skill) to carve such intricate designs. Plus, carving gives me neck pain, and I can only work for about an hour before I need a longer break. This has been one of the reasons why linocut has been, quite literally, painful for me
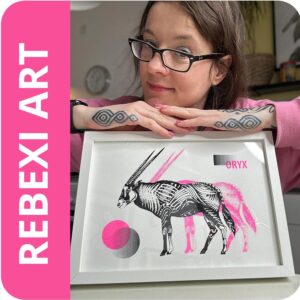
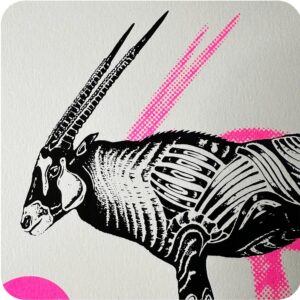
Now that I’ve delved into screen printing, I finally have a way to capture the fine details of my older drawings. So, it was time to revisit that drawer full of animal sketches. The design came together quickly because I already had a vision of combining the original drawing with geometric elements in bold colors. While working on it, I also decided to incorporate a halftone effect—an idea I’ve often admired in screen printing designs.
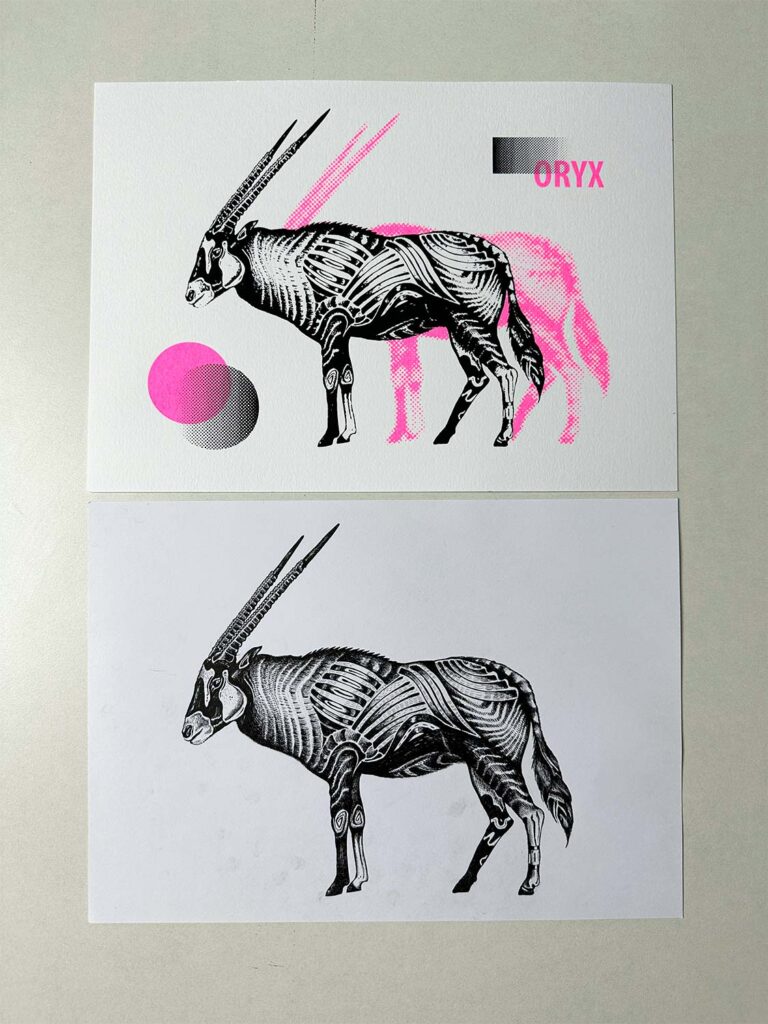
To prepare the drawing for printing, I had to vectorize it in Adobe Illustrator. While this process meant the design lost a few details from the original, and the lack of gradients or grayscale (black and white only) reduced some of its charm, I still think the result looks great. You can see and compare it in the attached image.
That said, I’d love to improve my vectorizing skills to get even closer to the original next time—and there will be a next time! I still have plenty of animal drawings in that drawer that could work as screen prints. I’m already planning at least one or two more, with my chameleon sketch likely being one of them.
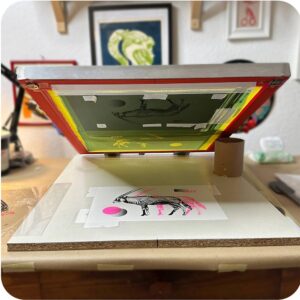
For this print, I used FLX SCREEN Hybrid Photo Emulsion, a 100T mesh, and water-based inks. I was worried that an 80T or 90T mesh might not capture the fine details of the drawing, but maybe it would have worked too? I’m still figuring out which screen meshes work best for different designs. From what I’ve read, the higher the mesh count, the better it handles detailed designs. But it’s all so subjective—what really counts as “detailed,” anyway?
Two quick updates:
1. I’m planning to update my blog more frequently—at least once a month! While I’m not completely in love with blogging on WordPress (the usability isn’t as smooth as I’d like), I’m currently researching other platforms that might be a better fit. For now, I’ll stick with what I have—it might already be good enough.
2. I’m also looking into a newsletter tool to send out monthly updates. This would include highlights of my latest artwork and some insights I’ve gained along the way. I think it could be a great addition!
Take care and have a wonderful week
By the way, you can get this Oryx print in my Etsy shop or Kasuwa shop (DE only).

Last but not least: watch this short pocess video of the printing process
