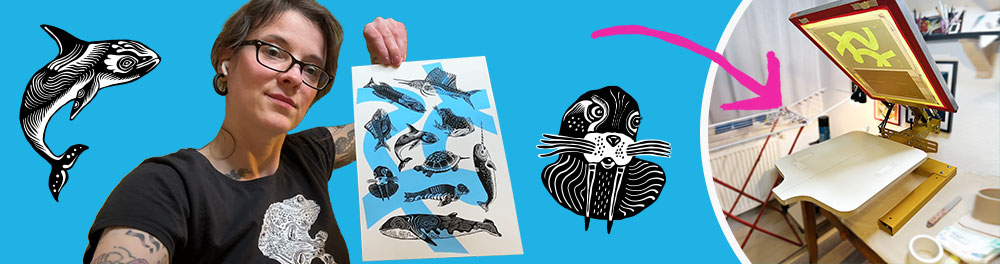
Creating a new stencil for screen printing
Now that my screens are reclaimed and degreased (check my last blog post), it’s time to coat them and burn in some new designs.
In this entry, I’ll walk you through my DIY process of making a new stencil for screen printing.
I did my best to document everything - there’s even a 10-minute video at the bottom (in German, so good luck with that). Keep in mind: this is a homemade setup, not a pro print studio. No dip tanks, no drying cabinets, no fancy machines. If you’re here for that, I will only disappoint you.
But if you’re curious about how I create my prints, interested in starting screen printing yourself, or just nosy about how a newbie manages, this one’s for you. Even skilled screen printers are welcome - feel free to drop me tips via email or DM on IG. Always appreciated!
Here are the four main “ingredients” for coating my screens:
Light sensitive Photo emulsion, a scoop coater and as a nice-to-haves: kitchen scraper and plastic scraper. More on how these come into play later.

Okay, I lied - I need more tools to coat and expose my screens. What a bummer! Here’s the rest of my screen-printing survival kit:


Turning My Bathroom into a Darkroom
Before anything else, I clean and vacuum my bathroom - not just because IT’S ABOUT TIME (seriously), but because this is where the magic happens. The cleaner, the better. I also move anything that shouldn’t get an accidental emulsion makeover.
Since the photo emulsion is light-sensitive, I need a darkroom. My small bathroom has tiny windows, making it a good candidate. Daylight, sunlight, or artificial white light are not invited and need to stay outside.
To block out unwanted light, I grab (A) black cardboard and tape to cover the windows, a quick 10-minute job. Once done, the room is pitch-black.
To see in the dark I use (B) a UV neutral yellow light bulb. Red would also work, but if you’ve ever stood in a fully red-lit room, you know it’s like being in a bad horror movie, visibility is awful. I hear colored LEDs (except white and blue) could work too, but for now I stick with my trusty yellow bulb.
Bathroom door closed, yellow light on, time to coat the screen!
Coating the Screen
I use FLX SCREEN hybrid photo emulsion, a ready-to-go, smurf-blue, thick liquid. No mixing, and it works for both water-based and plastisol inks.
If it’s been sitting for a while, I stir it slowly with a wooden spatula (oops, forgot to add that to my tools list!) and pour it even more slowly into the scoop coater until it’s half full. Slow stirring = fewer bubbles, and fewer bubbles = better results. I always get bubbles, though. You can let them pop naturally if you have the patience. I don’t.
The scoop coater has two edges: sharp and round. I use the sharp edge because it applies a thinner emulsion layer. Since I’m printing on paper, I need a high mesh count screen (yellow mesh) to control ink flow and capture fine details. If I were printing on fabric, I’d go for a lower mesh count for more ink coverage ( I am using waterbased inks) and likely do a 2:1 coating instead of my 1:1 coating.
But that’s a story for another blog entry.


So, where was I? Ah, right - I just poured the emulsion into the scoop coater. As seen in the pictures above, I hold the scoop coater in one hand and position the (C) degreased screen with the other on a non-slippery surface, angled slightly parallel to the coater. I always start coating from the print side (because that’s the golden rule, apparently).
Here’s how it goes down:
1. Starting at the bottom (1–2 cm from the frame), I press the sharp edge of the coater against the mesh.
2. I tilt it slowly, letting the emulsion flow evenly toward the screen.
3. The moment it touches the mesh, I swipe upwards in one smooth motion to the top (again, stopping 1–2 cm before the edge).
Timing is key
Too fast? Bubbles stay trapped, causing annoying little holes later.
Too slow? Too much emulsion, leading to drips.
I apply firm pressure—don’t worry, the mesh won’t break. No pauses, no second-guessing, just one fluid swipe. At the very top, I tilt the screen back quickly to let excess emulsion flow back into the coater instead of making a mess.
Once the print side is done, I flip the screen and coat the inside (squeegee side) the same way (1:1 coating).
(You can check the video at the end of the blog to see this in action.)
Before my first-ever coating, I did a “dry run” with an empty coater to get a feel for it. Admittedly, my blood pressure spiked when I finally did it for real with emulsion, but it gets easier with each screen. Now I am more relaxed and stop overthinking.
Most of the emulsion in the scoop coater won’t be used up if I coat only one screen, so I pour the rest back into the emulsion pot. I use an orange scraper to get as much out as possible - waste not, want not. Then I wash the coater immediately with water and a sponge before the emulsion dries.
Coating tip: Wear a hat while coating. I’ve had hairs land on freshly coated screens twice, and no, you can’t just pick them off. They stay. Same goes for dust—hence the pre-coating vacuum session.
Cleaning Up the Edges
Now that both sides are coated, it’s time for my green kitchen scraper to shine. I use it to gently remove the thick strips of emulsion that always form along the edges. Thanks to the scoop coater’s tiny leaks, these areas tend to hold too much emulsion - so much that they’d probably never dry. And drying is non-negotiable. Only bone-dry emulsion can be properly exposed later.
Sure, there is for example this fancy scoop coater with special edges that prevent this leakage, but not on my priority list right now.


Drying the Screen
The screen needs to dry with the print side facing down in the dark (or under yellow light). Gravity helps pull the emulsion downward, creating a nice, even surface on the print side - the side that actually does the printing. The inside (squeegee side) just holds the ink.
To position the screen properly, I use my trusty neon (D) orange clamps. They’re super handy - not just for drying but also for stacking multiple screens neatly on top of each other.
Some folks dry their screens in a dark cupboard overnight, but I don’t have a setup with proper air circulation and low humidity. So instead, I use a (F) fan heater to speed things up. This gets the temperature around the screen up to 35–40°C while keeping humidity below 40%. I keep an eye on this with my (E) hygrometers to make sure things don’t get too hot. I place 3 of them near the screen.
After 2–3 hours, I check if the emulsion feels really, really dry. Here’s the tricky part: emulsion is basically a humidity magnet. Even if the screen is perfectly dry, storing it in a humid place before exposure can make it absorb moisture again - and wet emulsion simply won’t expose properly.
That’s why I expose the screen immediately after drying. The downside of the heater? It eats up electricity and the fan stirs up all the dust I didn’t manage to vacuum away, meaning some of it might still land on the screen.
But for the moment it´s my best option.

In the meantime, while I let the screen dry, it´s time to build up my exposure unit in the bedroom right next to the bathroom. It´s easy to make a second darkroom in here because there are shutters I can pull down and also install a yellow light bulb to see something.
Setting up my exposure unit
It looks fancier than it is. For exposure, I use a small (L) 10W UV led light, but since it didn’t come with a stand, I repurposed my ring light as a holder. The UV light is taped to a ruler on top, facing down, while (K) 2 kg dumbbells keep the whole thing from tipping over.
Underneath, I place a kitchen stool, with a wooden plate on top. Over that, I put a layer of (J) black foam (5cm tall), covered with an opaque black cardboard sheet. This is where my screen will sit later.
This setup absorbs any sneaky light that might bounce up during exposure. Styrofoam from a hardware store works too.

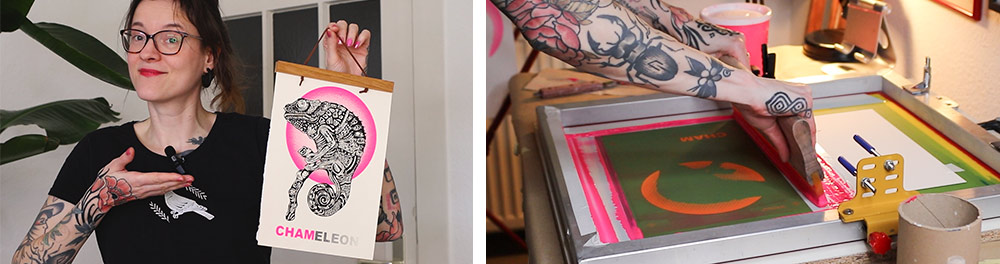
Preparing the film positives
My design is ready. It’s a chameleon, based on an old analog drawing I made years ago. I vectorized and color-separated it in Adobe Illustrator, assigning each color to its own layer. Since this will be a two-color screen print, I separated the black and pink layers onto individual artboards. Each one gets printed in the darkest black my printer can manage onto transparent film, also known as a positive or transparency.
But why black? During exposure, the black areas block the UV light, preventing the emulsion underneath from hardening. Later, when washed out with water, these areas become the open stencil where ink can pass through the mesh. The rest of the emulsion hardens and stays intact, blocking ink flow in those parts. That’s how the stencil is formed.

I use A4 film sheets that work with my A4 inkjet printer. Laser printers are an option too, but their black ink usually isn’t as opaque as inkjet. To make color alignment easier later, I add registration marks to each printout.

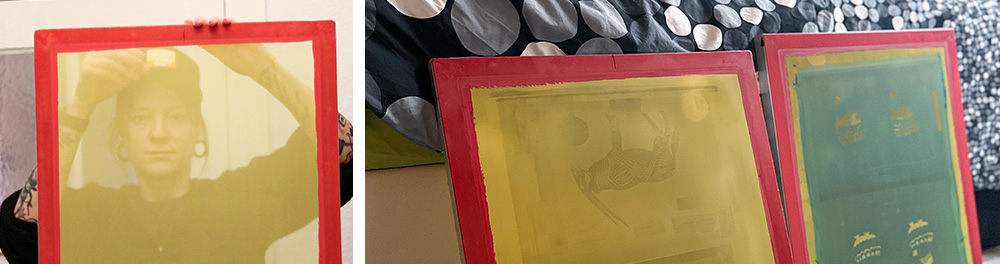
Here are the two (G) films, one for the pink (left) and one for the black (right). The film has a milky side, which is the correct side to print on. Printing on the wrong side results in smudging. A quick test is to lick your finger and touch the edge. If it feels sticky, that’s the right side.
I also check that the black areas are fully opaque and the lines are sharp. The stencil will only be as good as the film.
Exposing the screen
The screen is now (hopfully) fully dry. I check by touching the emulsion at the edges or, as some tutorials suggest, rubbing my cheek against it (Yes, really!). Time to move on to the next step: exposing.
Before that, I need to position the films on the print side of the screen, flipped. That means placing them face down. Seriously, double-check this!
To keep them from shifting, I tape them down with transparent (H) scotch tape. A small piece on on each corner. No need to mummify them, just enough to keep them in place when things get serious.

I carry the screen to the bedroom and place it on the foam, print side up. As mentioned, the only light source is another yellow light bulb. Next, I place a heavy (I) white glass plate (8mm) on top to press the films firmly against the emulsion layer. this makes sure all the fine details and edges of the design expose sharp and no light can sneak around them. Exposure time depends on several factors, including mesh count, coating, lamp type, distance from the UV light, and the emulsion used.
I set the UV light distance to approximately 55–60 cm, which happens to be the diagonal of the screen.
Now I set a timer, turn on that UV light, and leave the room. Staring directly into UV light isn’t the best idea, so I wait outside until the timer goes off. With my current setup, I’ve fine-tuned the exposure time to around four minutes for my 100T screen mesh. When the timer goes off I turn off the UV light, take off the glass plate, remove the films and carry the screen back to the bathroom.
Washing out the design
I’m entering the final phase, the moment of truth, joy or dispair. To protect the bathtub from scratches, I lay out old towels before placing the screen inside. I give it a quick rinse from both sides with low water pressure, then let it sit for a minute. The design is already starting to show slightly.
Now for the washout. I spray the print side (mostly the print side) from top to bottom with moderate water pressure. A regular showerhead works, but I usually swap it for the garden hose becaue it has more pressure. I repeat this until the stencil washes out completely. Any areas that were blocked by black on the film should rinse away easily, revealing the yellow mesh underneath. More detailed parts might need extra attention compared to larger areas.


At this point, I can usually tell if something has gone super wrong.
1. If the design doesn’t wash out fully or at all, I might have overexposed the screen. It is also possible that my film wasn’t opaque enough, letting UV light sneak through and expose areas that should have stayed soft.
2. If the stencil falls apart under the water pressure, with emulsion peeling off, swelling up, I probably underexposed it. Another likely culprit is that the screen wasn’t completely dry when I exposed it.
I have run into all of these problems before. I still sometimes do. It is frustrating, but also kind of great. The only way to learn is to mess up and fix it.
By the way for this one, I messed up early. A small water drop landed on the film before I mounted it on the screen, smearing a tiny spot of black ink away. I didn’t notice until washout, where a crucial part of the design stayed solid that should have washed out. I had to redo the entire coating and exposure, adding hours to the process. Lesson learned: always check the films carefully before exposing.
If everything looks good, I do a final check by holding the screen up against the yellow light with a magnifying glass to see if I missed any spots that didn’t wash out properly.
Once I am happy, I let the screen dry completely again with help from the heater before doing a post-exposure. This means exposing it for three times the original time to harden the emulsion even more, making the stencil more resistant to water and cleaning. No need for yellow light for this part.
Anyway, the stencil is now ready to print (a story for another blog entry). Thanks so much reading this far and have a wonderful week.
Exposure tip: One way to find the right exposure time is to use a step wedge exposure calculator.
If you have another spare 10 minutes you can watch my YouTube videos below. You can turn on subtitles! :D

Upcoming Blog: Probably next one will be how I printed the chameleon!
Newsletter Update: I still have not written my first "monthly" newsletter. I hope in the next 2 weeks I find the time.
YouTube Plans: my channel is set up! Great for longer videos like the one above. Not sure how often I’ll post - maybe one video per month and a few shorts, depending on my free time.